|
|
CREATING A PEYOTE BEZEL (©2012 Deborah Roberti)
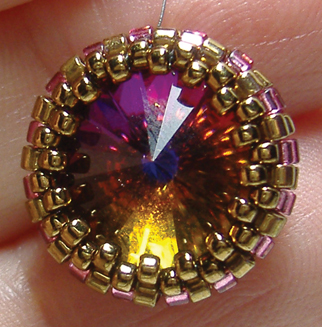
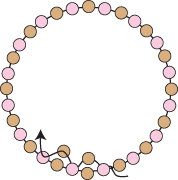
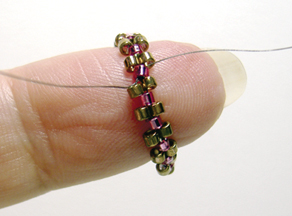
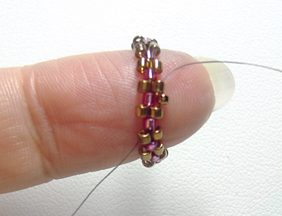
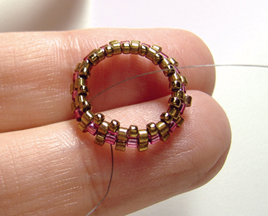
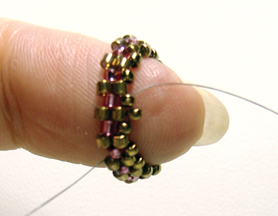
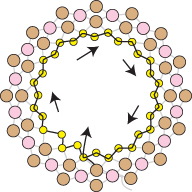
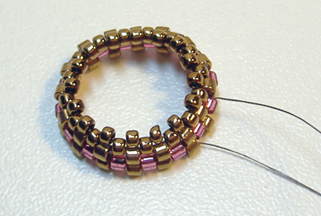
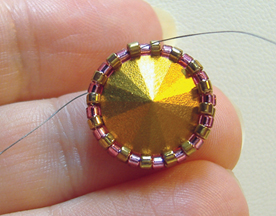
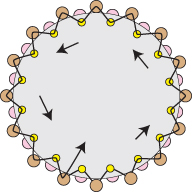
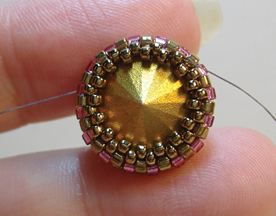
The base for all of my rivoli patterns is the peyote bezel. Made up of size 11/0 Delica beads and 15/0 seed beads, this beaded bezel—or cup—holds the rivoli in place and also enables you to embellish the rivoli by beading around it. In the Materials list for this tutorial and for all of my rivoli patterns, I specify the use of 15/0 Japanese seed beads. Why Japanese seed beads? When it comes to creating a peyote bezel, size is everything. Steadily decreasing the size of the beads in each row causes the bezel to “cup.” However, not all seed beads are the same size. A size 15/0 Czech seed bead is much smaller than a size 15/0 Japanese seed bead. I suggest using all Japanese seed beads for my projects because this combination of beads works for me. Once you know how to create a peyote bezel, however, you can use whatever seed beads you prefer. In addition, for Step 1, I always instruct you to start by stringing a certain number of two different colored Delica beads, alternating between the two. This is just my “thing,” so to speak. You don’t have to do this. You can use all one color. However, when you use two colors, you end up with a nice single ridge of different colored Delica beads, making it really easy to find the center of the bezel when you are adding beads later to embellish your rivoli like this:
Swarovski #1122 12mm round rivoli: 32 size 11 Delica beads I’ll add to this list as I play with different rivoli sizes. Materials for this tutorial: • About 1 yard of 4 lb. FireLine • One size 12mm round rivoli • Approximately 32 size 11/0 Delica beads (Color1) • Approximately 16 size 11/0 Delica beads (Color2) • Approximately 64 size 15/0 Japanese seed beads
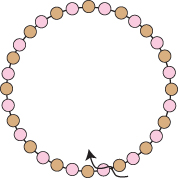
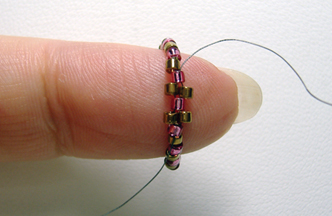
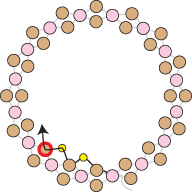
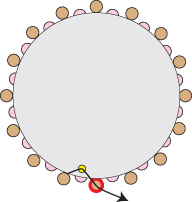
For this tutorial, we’ll bezel a size 12mm rivoli. Step 1: Thread your needle with 1 yard of FireLine. Start by stringing 32 Delica beads, alternating between Color1 and Color2. Leaving about a 6-inch tail, tie these beads in a circle with a double knot:
Step 2: Go through the next Color2 Delica bead on this circle of Delica beads:
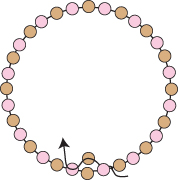
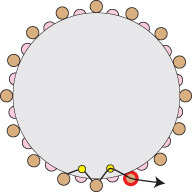
Step 3: Next you want to use the peyote stitch to add another row of Delica beads. String a Color1 Delica bead, go around (“skip”) the existing Color1 Delica bead on the circle of Delica beads and then go through the Color2 Delica bead on the circle. This new Color1 Delica bead should “sit” on top of the existing Color1 Delica bead on the circle:
Again, this new Color1 Delica should “sit” on top of the existing Color1 Delica bead on the circle:
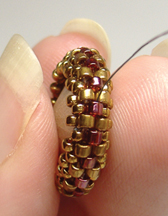
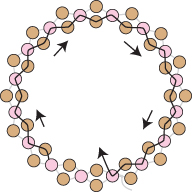
Step 5: Repeat Step 4 all the way around the circle of Delica beads until you get to the end:
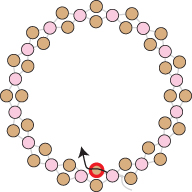
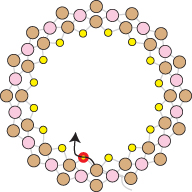
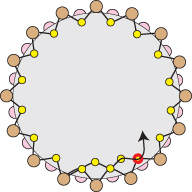
Step 6: With circular peyote, once you get to the end of the row, you want to “step up” (go to the inside of your band of Delica beads) and go through the Color1 Delica highlighted in RED:
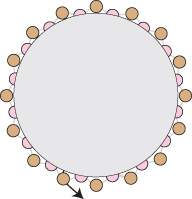
String a size 15/0 seed bead. Go through the Color1 Delica bead highlighted in RED. The
Again, the 15/0 seed bead will sit on top of the Color2 Delica bead and between the two Color1 Delica beads:
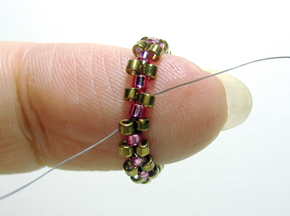
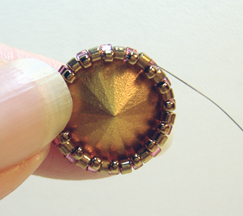
Pull nice and tight as you add 15/0 seed beads so you get a uniformly firm “cup”:
String a size 15/0 seed bead. Go through the
15/0 seed bead highlighted in RED. This new
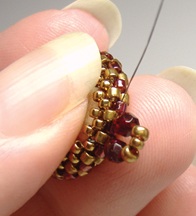
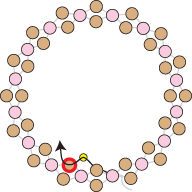
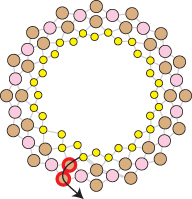
Step 12: String a size 15/0 seed bead. Go through the 15/0 seed bead highlighted in RED. Again, this new 15/0 seed bead will sit on top of the Color1 Delica bead and between the two 15/0 seed beads from the previous row:
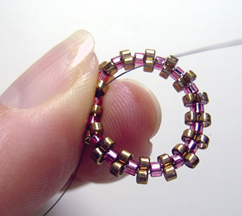
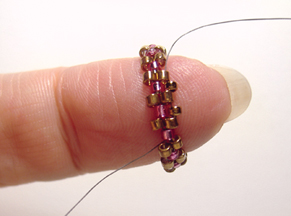
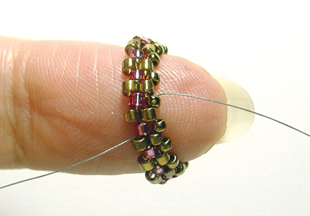
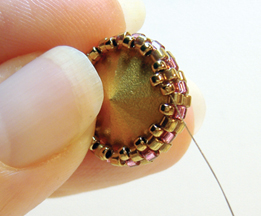
Step 13: Repeat Step 12 all the way around the circle until you get to the end. Again, pull nice and tight as you add 15/0 seed beads so you get a uniformly firm “cup”:
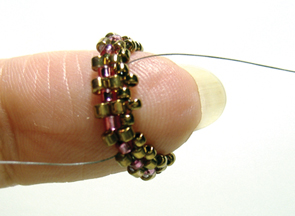
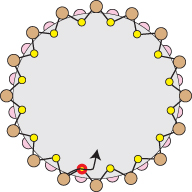
Note: For larger rivolis—size 16mm and larger—you will need to add an additional row of size 15/0 seed beads. Step 14: Weave your way to the other side of the bezel so that you are exiting from a Color1 Delica bead (go through Color1 Delica beads highlighted in RED). This is a good time to tie a knot before you continue with the back side of your bezel:
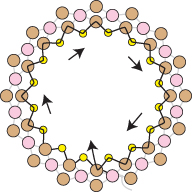
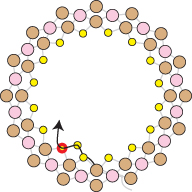
String a size 15/0 seed bead. Go through the Color1 Delica bead highlighted in RED. The 15/0 seed bead will sit on top of the Color2 Delica bead and between the two Color1 Delica beads:
Step 17: String a size 15/0 seed bead. Go through the Color1 Delica bead highlighted in RED. Again, the 15/0 seed bead will sit on top of the Color2 Delica bead and between the two Color1 Delica beads:
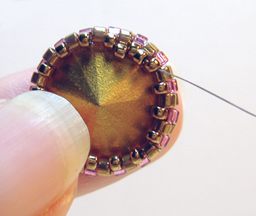
Pull nice and tight as you add the 15/0 seed beads so you get a uniformly firm “cup”. The rivoli will start to stay in place without support but it will still pop out with little effort:
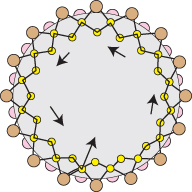
Step 20: String a size 15/0 seed bead. Go through the 15/0 seed bead highlighted in RED. This new 15/0 seed bead will sit on top of the Color1 Delica bead and between the two 15/0 seed beads from the previous row:
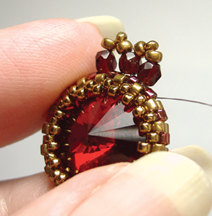
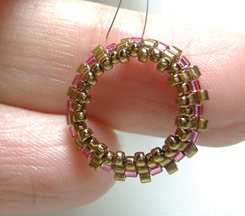
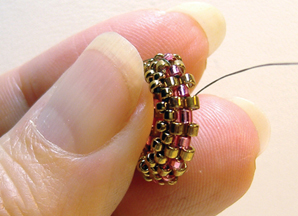
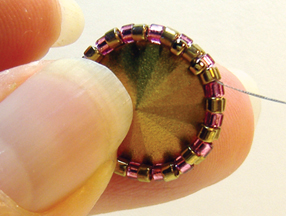
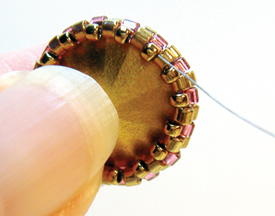
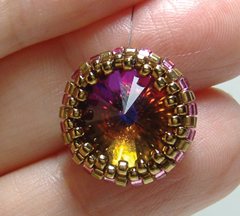
Flip it over to see how pretty the front side is:
|