|
|
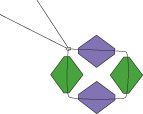
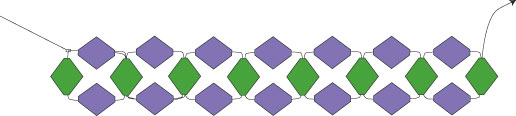
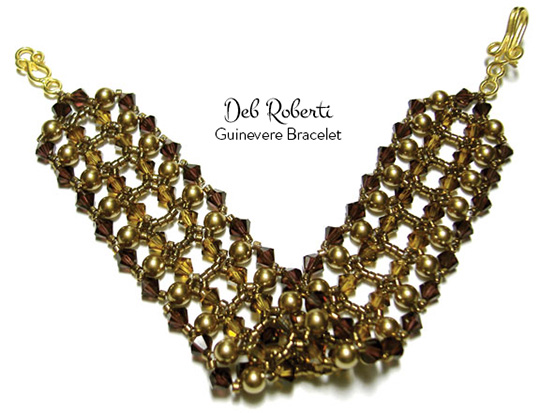
RIGHT-ANGLE WEAVE (RAW) (©2005 Deborah Roberti) Right-angle weave, also called RAW, is one of the easiest stitches to learn. When two needles are used, it is often called cross-weaving (because the threads cross in opposite directions through the beads) and is the basic stitch used for Japanese-style beadwork where it is often referred to as “Hachinoji-ami” or “Kousa-ami.” Right-angle weave is so-named because of the way the beads lie at right angles to one another. It is a very versatile weave and you can use any types or sizes of beads, as well as combinations of beads of different sizes and shapes to create different effects. If you want to learn more about right-angle weave, get a copy of Christine Prussing’s Beading with Right Angle Weave. To make it easier to explain right-angle weave, I’ve used green and purple beads for this tutorial but you can use whatever colors you want. Step 1: String a purple bead, a green bead, a purple bead and a green bead. Tie them together with a double knot, creating a four bead unit, which could look like a circle or square, depending on what shape beads you used:
Step 2: Continue back through a purple bead and exit out of a green bead (in either direction—it doesn’t matter):
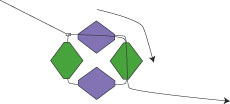
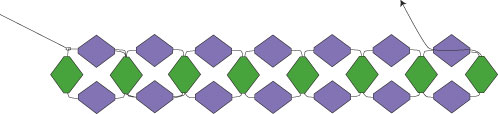
Step 3: String a purple bead, a green bead and a purple bead. Go around and back through the green bead you exited at the end of Step 2 as in the diagram below:
This is the basic premise of right-angle weave—you always come back around from where you last exited. If only life were that simple... Step 4: Continue back on through the purple bead and exit out of the green bead as in the diagram below:
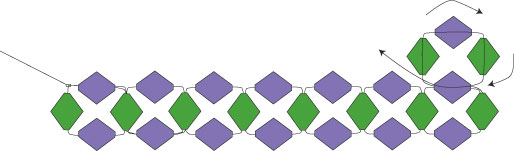
Step 5: Continue on in this fashion (repeat Steps 3 and 4) until your bracelet or necklace is the length you want it.
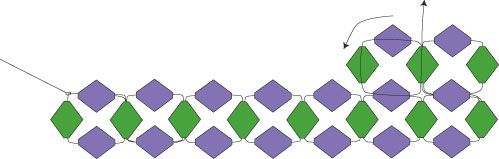
Step 6: To add additional rows, go through the top purple bead as in the diagram below:
Step 7: String a green bead, a purple bead and a green bead. Go around and back through the purple bead you exited in the last step:
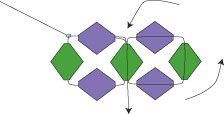
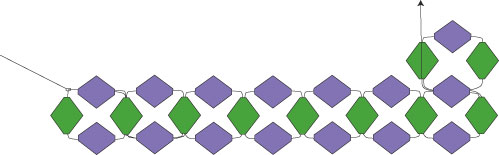
This is the start of Row 2. Step 8: Go up through the green bead on Row 2 as in the diagram below:
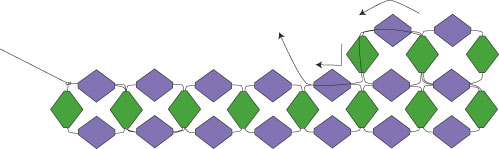
Step 9: Here, I’m afraid, it gets tricky. String a purple bead and a green bead. Go down and through the purple bead on Row 1, and then up through the green bead on Row 2 that you exited at the end of the last step:
Step 10: Continue on through the purple bead and the green bead on Row 2 that you strung in the last step, and then through the purple bead on Row 1:
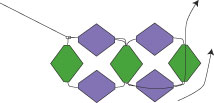
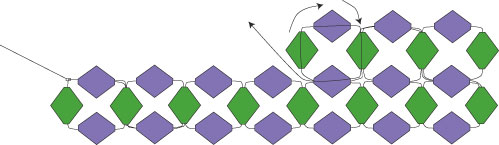
Step 11: String a green bead and a purple bead. Go around and through the green bead on Row 2 that you exited from at the end of the last step. Continue on through the purple bead on Row 1:
Step 12: Continue on through the green bead on Row 2:
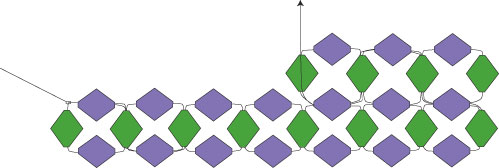
Repeat Steps 9 to 12 until you have completed the Row 2. To add a third row, repeat Steps 6 to 12. Once you get the hang of it, you can easily create different bracelets by using different colored beads:
Free patterns that use the right-angle weave include:
|