 |
|
CALI BAND (©2017 Deborah Roberti)
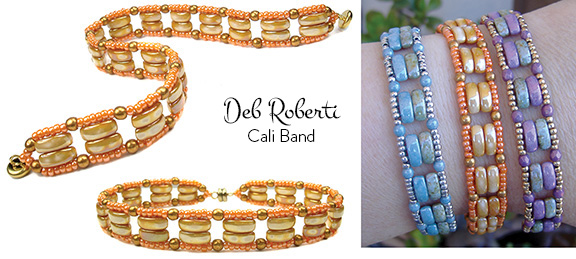
Cali beads are Czech 3x8mm marquise-shaped beads with three holes! These beads remind me of watch band links and I love the way they look paired up in some easy stacker bands. You can, of course, stack the beads or the bands as high as you want. It’s a very easy, and sturdy, stitch pattern to master. MATERIALS
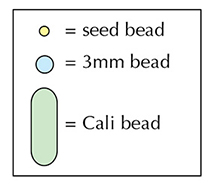
Step 1: Thread your needle with about 3 yards of FireLine (or start with a length that you feel comfortable working with and add more later). Leaving about a 6-inch tail that you can weave in and make disappear at any time, string a seed bead and go through the bottom holes of two Cali beads. String a seed bead, a 3mm bead, two seed beads and a 3mm bead. Tie the beads together in a circle with a tight double knot:
Step 2: Go back up through the seed bead highlighted in RED:
Step 3: String two seed beads. Go across through the middle hole of the two Cali beads that you strung in the first step. (highlighted in RED):
Step 4: String two seed beads. Go down through the seed bead, the 3mm bead and the seed bead highlighted in RED:
Step 5: String a seed bead. Go through your clasp and then back up through the seed bead that you just strung. Continue up through the seed bead highlighted in RED:
Step 6: Go back up through the 3mm bead and the three seed beads highlighted in RED:
Step 7: String two seed beads. Go across through the top hole of the two Cali beads that you strung in the first step (highlighted in RED):
Step 8: String two seed beads. Go down through the three seed beads, the 3mm bead and the seed bead highlighted in RED:
Step 9: To reinforce your attachment to the clasp, go down through the seed bead highlighted in RED, around through your clasp and back up through the seed beads highlighted in RED:
Step 10: Go back up through the 3mm bead and the five seed beads highlighted in RED:
Step 11: String a seed bead, a 3mm bead and a seed bead. Go through the bottom holes of two new Cali beads. String a seed bead, a 3mm bead and a seed bead. Go down through the five seed beads, the 3mm bead and the seed bead highlighted in RED:
Step 12: To reinforce your attachment to the clasp once more, go down through the seed bead highlighted in RED, around through your clasp and back up through the seed beads highlighted in RED:
Step 13: Go back up through the 3mm bead, the six seed beads, the 3mm bead and the seed bead highlighted in RED:
Step 14: String two seed beads. Go across through the middle holes of the two Cali beads that you strung in Step 11 (highlighted in RED):
Step 15: String two seed beads. Go down through the seed bead, the 3mm bead and the seed bead highlighted in RED. Continue across through the top holes of the two Cali beads below (also highlighted in RED):
Step 16: Go back up through the seed bead, the 3mm bead and the three seed beads highlighted in RED:
Step 17: String two seed beads. Go across through the top holes of the two Cali beads that you strung in Step 11 (highlighted in RED):
Step 18: String two seed beads. Go down through the three seed beads, the 3mm bead and the seed bead highlighted in RED. Continue across through the top holes of the two Cali beads below and up through the seed bead, the 3mm bead and the five seed beads highlighted in RED:
Step 19: String a seed bead, a 3mm bead and a seed bead. Go through the bottom holes of two more Cali beads. String a seed bead, a 3mm bead and a seed bead. Go down and around through the five seed beads, the 3mm bead and the seed bead highlighted in RED. Continue across through the top holes of the two Cali beads below and up through the seed bead, the 3mm bead and the five seed beads also highlighted in RED:
Step 20: Go back up through the seed bead, the 3mm bead and the seed bead highlighted in RED:
Step 21: String two seed beads. Go across through the middle holes of the two Cali beads that you strung earlier (highlighted in RED):
Step 22: String two seed beads. Go down through the seed bead, the 3mm bead and the seed bead highlighted in RED. Continue across through the top hole of the two Cali beads below and up through the seed bead, the 3mm bead and the three seed beads highlighted in RED:
Step 23: String two seed beads. Go across through the top holes of the two Cali beads that you strung earlier (highlighted in RED):
Step 24: String two seed beads. Go down through the three seed beads, the 3mm bead and the seed bead highlighted in RED. Continue across through the top holes of the two Cali beads below and up through the seed bead, the 3mm bead and the five seed beads highlighted in RED:
Step 25: Repeat Step 19 to Step 24 until your bracelet is the length you want it, minus about a third-inch and the length of your clasp:
Step 26: To attach the other end of your clasp, string a seed bead, a 3mm bead, two seed beads, a 3mm bead and a seed bead. Go around and down through the five seed beads, the 3mm bead and the seed bead highlighted in RED. Continue across through the top holes of the two Cali beads below and up through the seed bead, the 3mm bead and the five seed beads highlighted in RED:
Step 27: Go back up through the seed bead, the 3mm bead and the seed bead highlighted in RED:
Step 28: String a seed bead. Go through your clasp and then back down through the seed bead that you just strung. Continue down through the seed bead, the 3mm bead and seed bead highlighted in RED. Go back across through the top holes of the two Cali beads below:
Step 29: Go back around through the beads highlighted in RED and the clasp:
Use your extra tail thread to go back through the beads along the outer edges.
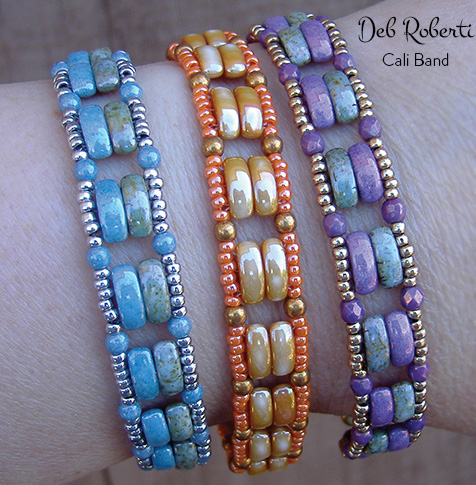
Beads used in my photos NOTE: Bead colors and coatings (and even bead types!) seem to be disappearing at a rate that I can no longer keep up with. I try to find substitutes when I can but "discontinued" seems to be the norm these days.
Blue/Green version Apricot version Purple/Green version
|


