 |
|
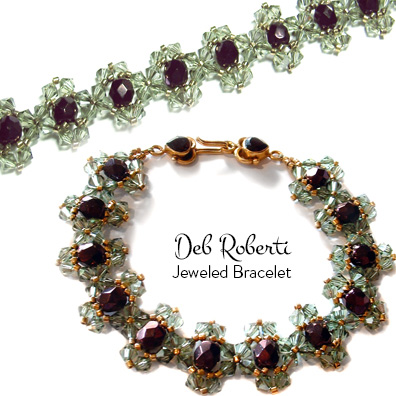
JEWELED BRACELET (©2005 Deborah Roberti)
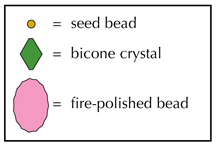
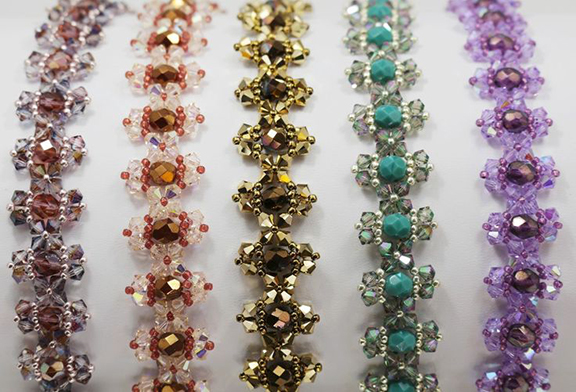
I used 6mm fire-polished beads for the center beads but you could easily use any 6mm oval-shaped beads or even 6mm bicone crystals. It's an extremely versatile pattern. By adding more thread, it makes a lovely necklace as well. MATERIALS (for a 7-inch bracelet, not including clasp)
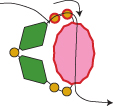
Step 1: Thread your needle with 3 yards Nymo, C-Lon or Fireline. String two seed beads, a fire-polished bead, two seed beads, a crystal, a seed bead and a crystal. Bring the beads to the middle of your length of thread, and tie them in a circle with a double knot:
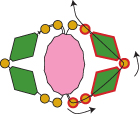
You’ll be starting in the middle of the bracelet, using half the thread to create the right side of the bracelet and the other half (the long tail) to create the left side of the bracelet. Step 2: Go back around through the two seed beads and the fire-polished bead that you strung in the last step (highlighted in RED):
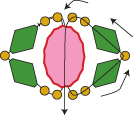
Step 3: String two seed beads, a crystal, a seed bead, a crystal and two seed beads. Go around and back down through the fire-polished bead highlighted in RED:
Step 4: Go back around through the two seed beads, the crystal, the seed bead, the crystal and the seed bead highlighted in RED:
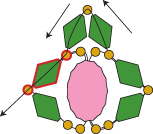
Step 5: String a crystal, a seed bead and a crystal. Go down through the seed bead, the crystal and the seed bead highlighted in RED:
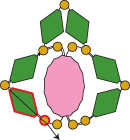
Step 6: Go down through the bottom left crystal and the bottom left seed bead highlighted in RED:
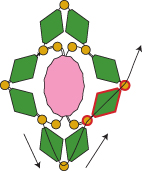
Step 7: String a crystal, a seed bead and a crystal. Go up though the bottom right seed bead. Continue on through the bottom right crystal and the seed bead (all beads highlighted in RED):
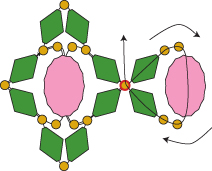
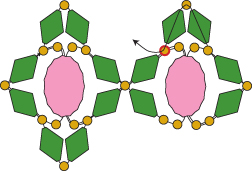
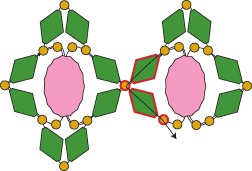
You’ve just finished the first jeweled motif for the bracelet. The rest of the bracelet is completed by adding additional motifs. Step 8: To create the next motif, string a crystal, two seed beads, a fire-polished bead, two seed beads and a crystal. Go around and up through the seed bead that you exited at the end of the last step (highlighted in RED):
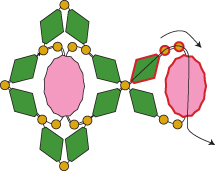
Step 9: Go back around through the crystal and the top two seed beads of this new motif, and then down through the fire-polished bead (all beads highlighted in RED):
Step 10: String two seed beads, a crystal, a seed bead, a crystal and two seed beads. Go around and down through the fire-polished bead that you exited at the end of the last step (highlighted in RED):
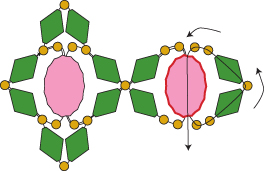
Step 11: Go back around through the two seed beads, the crystal, the seed bead, the crystal and the seed bead that you added in the last step (highlighted in RED):
Step 12: String a crystal, a seed bead and a crystal. Go through the seed bead highlighted in RED:
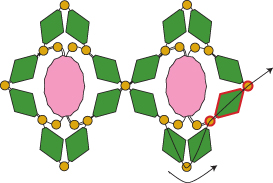
Step 13: Continue on down through the crystal, the seed bead, the crystal and the seed bead highlighted in RED:
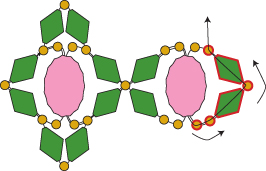
Step 14: To finish this motif, string a crystal, a seed bead and a crystal. Go up though the seed bead, crystal and the seed bead highlighted in RED:
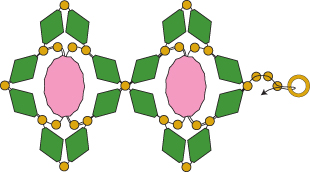
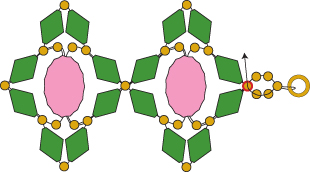
Repeat Steps 8 to 14 until you have about 10 to 12 inches of thread left. Step 15: To attach the right side of the clasp, string three seed beads. Go through the clasp and back through the last seed bead you just strung:
Step 16: String two more seed beads and go up through the seed bead you exited at the end of Step 14 (highlighted in RED):
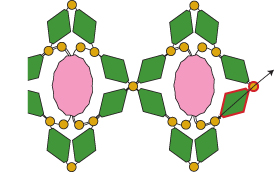
Go back around through this circle of seed beads and the clasp several times to reinforce the attachment to the clasp. Weave back into the bracelet, knot in several places, and cut your thread. Step 17: To complete the left side of the bracelet, flip the bracelet around and thread your needle with the other half of the thread (the long tail from Step 1). Go up through the crystal and the seed bead highlighted in RED to weave your way out of the motif so that you are exiting from the last seed bead:
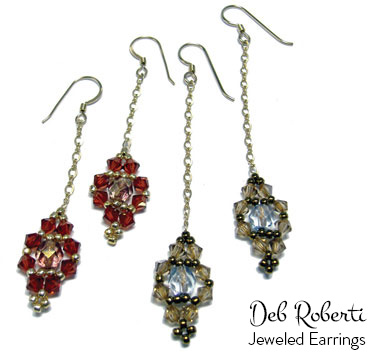
Repeat Steps 8 to 14 until your bracelet is the length you want it. Repeat Steps 15 to 16 to attach the other end of the clasp. A matching free pattern for the Jeweled Earrings is available by clicking on the photo below:
You can find many more color combinations at the RedPandaBeads.com Gallery of Color Suggestions!
|
